
How to sew a Double Zip Pocket
07:00Hello lovelies,
My fabulous office manager Amanda has finally given me a reason to spend on supplies, she needs a work bag! We've decided to modify a Nappy Bag pattern to suit her needs, so I'll be showing you a few different tutorials to make your own bag suitable for work!
Today we'll be showing you how to make a double zip pocket. This is excellent for a work bag, we all have things we need to keep hidden away at times, whether it's your phone, car keys or personal items. From the outside it looks like a regular zip pocket, but there's another zip pocket inside.

This double zip pocket does add bulk to the lining side that it's inserted into, so make sure the depth of your bag can handle it. It wouldn't look great on a small bag!
I wouldn't recommend using directional fabric, but if you absolutely must then I've worked out which bit needs to be where for you!
You will need to cut the following from both your pocket fabric, and some medium weight stabiliser:
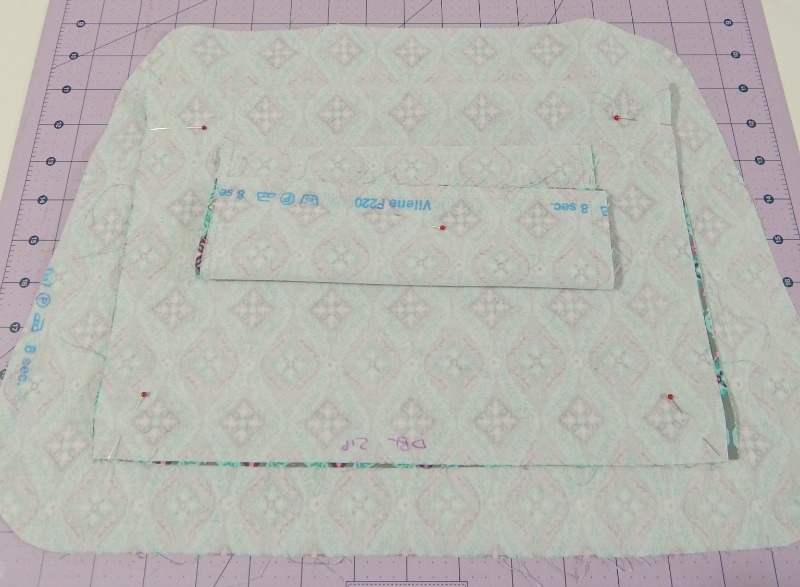
One piece 13" W x 17.5" H & One piece 9" W x 12" H . You will also need one 7" zip, one 11" zip and some double sided basting tape such as Collins Wonder Tape. Apply the fusible interfacing to both pocket pieces.
Lay the smaller pocket piece right side down on top of the larger pocket piece, 1" from the bottom. If you are using directional fabric, the large pocket piece should be right way up, the smaller pocket piece should have the print upside down.


Lay the large pocket piece on top of your lining panel. In this case I'm using the Nappy bag pattern, so my measurements are for that. Place the large pocket piece with any directional print upside down. You should place this pocket piece 1.5" from the bottom of the Nappy bag lining panel.

As before, sew around the box, steam the stitches, cut through the central line and triangles and then push through to the back of the main lining panel.


On the wrong side of the lining panel, fold the large zip pocket down matching raw edges and stitch around all three sides ensuring you don't catch the main lining panel, or the small zip pocket in the stitching. I like to pin the small zip pocket out of the way for this step.

It's only when the pocket is open that you'll see the second zip pocket making it safe and discreet.

Have you modified the Nappy bag to suit your needs? If so I'd love to hear from you!


2 comments
Outstanding! Your directions are so clear - I believe I will make this in my next bag! Thanks for sharing your time and talent! :-)
ReplyDeleteThanks! It's such a sneaky technique!
Delete