
Stashbusting September - Circle Skirt with pockets
15:36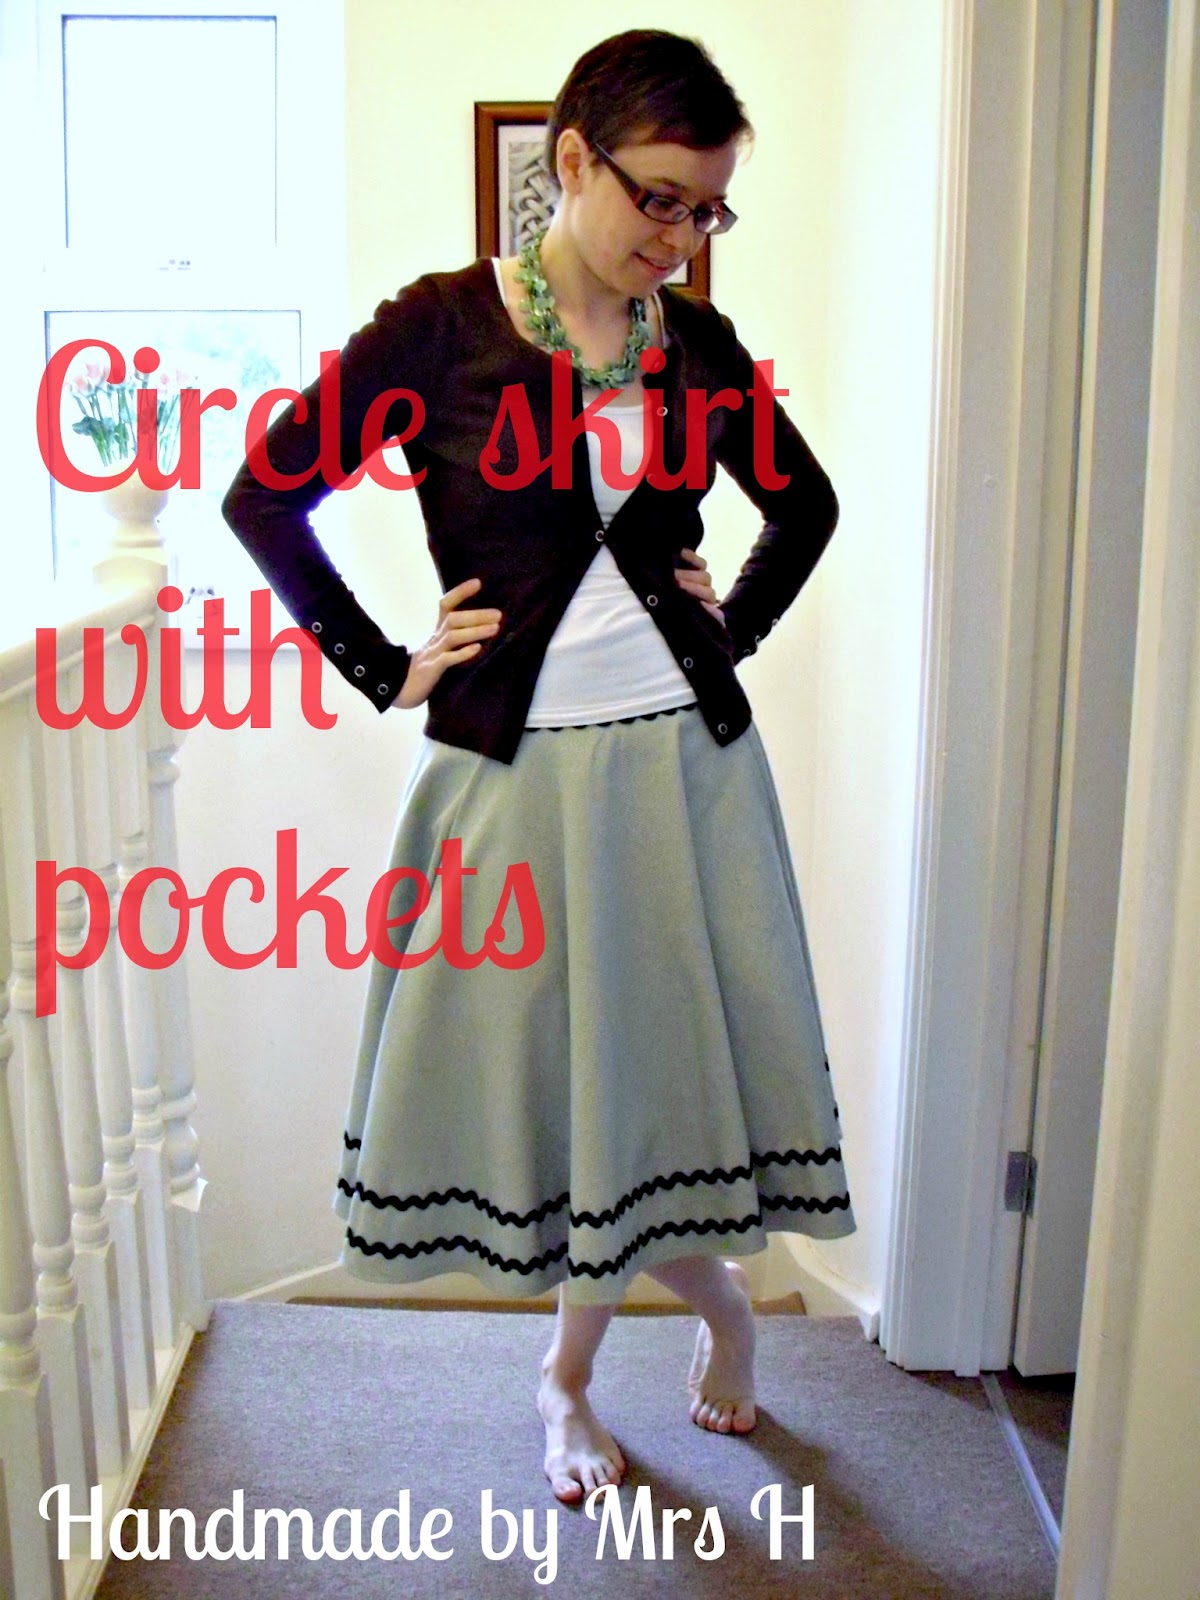
So...it turns out I was serious about de-stashing. Who knew this would be the year?!
I bought this heavy cotton with a skirt in mind (2 years ago...) and just so happened to have 25 meters of matching ric rac. Funny how 'just happening' to have 25 meters of something happens to me.

So here's how I made it.
Firstly I went over to Made and followed her tutorial there to work out my measurements. Do yourself a favour and use an elastic waistband as she did....but if you're a glutton for punishment, my fixed waistband is below.
So secondly then I drew out my doughnut using Dana's tutorial for the measurements on my fabric that was folded into quarters. I used my frixion pen that I love so much. Oh frixion, how much easier you make my life!

Then I cut out the pockets and the waistband. I made the waistband 8" high x the length of the top circle in my doughnut. Or middle circle. I won't tell you the size of it though because I didn't write it down. Let's pretend it's the same as yours.

Next I went through and overlocked all my edges except on the waistband because I forgot. You should overlock or zig zag all of your edges if your fabric is prone to fraying as mine was.
(I mostly did this to justify having spent £200 on a serger earlier in the year, the cost per use is going down the more I use it!)

Then I folded the doughnut in half and measured 3" down from the top and drew in a diagonal(ish) line for my pockets on each side. I wish I'd done these maybe 1.5" or so down instead though as the pockets are a bit too centre front.

Then on one folded edge I cut a 9" slit in as I was going to use an 8" zip.
Here it is all laid out. Don't be fooled, that sucker took up my whole living room floor space!

Next I pinned the pocket pieces to the doughnut along the pocket slits leaving a small gap at the bottom and about an inch at the top. I sewed where the pins are from bottom of pocket to top.

You can see I left a small 1/4" gap at the bottom of the slit beneath each pocket.

Then I folded the skirt so that both pockets were together with their seams lined up and sewed around where the black lines are. Can you tell that I don't do my pattern illustrations myself? In fact, this is usually the quality of one of my 'sketches' that I send to my illustrator! He then makes it look like it should.

Ok, so next I took the waistband and pinned my ricrac along one edge.


Then I laid the waistband on top of my top edge of the doughnut and leaving 2" overhanging, pinned and sewed around the whole waistband. I did it this way so that I'd be able to get the even ric rac and a topstitch on the base of the waistband.

I marked where I wanted the buttons using my frixion pen whilst I was wearing the skirt.

It was a good look.....can't think why Dusband was laughing...

So then I did my buttonholes on my sewing machine. Oh, how I love my buttonhole stitch on my sewing machine, it's so simple, even I can do it! And they look really professional.

I slit through them with my seam unpicker and sewed on my buttons in the right place.
Next I turned up the hem 1.5cm and stitched it in place. I didn't bother turning it under twice as I'd already overlocked it and I wanted the skirt to reach just below my knee so didn't want to lose too much length.

Then, on the right side of the skirt I laid out a row of ric rac 1" from the hemmed edge. Do you like how I can swap from metric to imperial within one easy step? :)

I pinned on both rows of ric rac as I went to make it a bit easier to ensure they weren't wonky. Seriously, it felt like it was MILES of pinning..... I don't think I'd realised how long the hem would be on a circle skirt!

Then I stitched the ric rac down using a matching coloured thread and posed for some awkward photographs. Thanks Dusband!

What's that? You want a goofy grin pic? Coming right up!
(yes, my hands ARE in my in-seam pockets!)


This project used up approximately 400g (14oz) of my stash which is a good effort, but having started with 88kg (194lbs), I may have to follow the Rancic's motto...Go big, or go home!
Do you have any muchos fabric stashbusting ideas for me?


4 comments
Looks wonderful Samantha. You're so clever. All I can say is thank heavens I don't have to test this one out or you would find out how vocal I can really be. LOLL
ReplyDeleteYour skirt looks super cute! Well done using up some of your stash! I switch between metric and imperial too lol Sometimes it's just easier that way, right?!
ReplyDeleteSoo cute, especially with the ricrac!
ReplyDeletethis is so cute.
ReplyDeleteDebi @ Adorned From Above